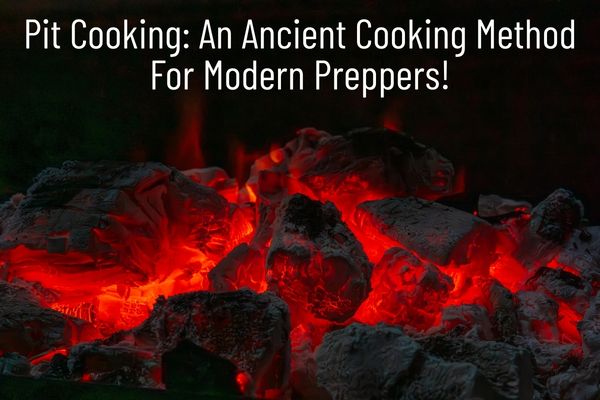
Introduction: Why Pit Cooking Matters for Preppers
Pit cooking is one of man’s oldest ways to prepare food and it remains a vital skill for todays’ preppers because of its simplicity.
At its core, pit cooking is a low-tech method that relies on earth, heat retention and time rather than electricity or complex equipment. Pit cooking can scale from feeding a small family to cooking for a larger group but it is not a shortcut or suited for fast cooking times. It requires:
- Forethought
- Patience
- Practice
Pit cooking is best approached as a planned, controlled cooking method. Learning it ahead of time allows people to understand heat behavior, food safety considerations, and local environmental factors in a low-stress setting.
What Is Pit Cooking?
Pit cooking is a method of preparing food in an earthen pit using stored heat rather than direct flames. Typically, stones or soil are heated, food (often wrapped or protected) is placed inside the pit and the pit is covered to trap heat over an extended period.
Pit cooking differs from open-fire cooking in important ways.
- Open-fire cooking exposes food directly to flame and fluctuating temperatures.
- Pit cooking relies on residual heat and insulation, creating a slow, steady cooking environment.
Tip: Pit cooking encourages a slower, more deliberate approach to cooking that aligns well with long-term resilience planning.
How Pit Cooking Works
Pit cooking works by using the ground as a natural heat container. Releasing heat gradually, it is absorbed into stones, soil or coals, which then radiate warmth over several hours resulting in a moist, gentle heat similar to braising or slow roasting.
Insulation plays a critical role as well, with coverings such as soil or materials reducing heat loss, allowing connective tissues to break down gradually and flavors to develop over time.
Because pit cooking does not allow for quick temperature adjustments, awareness of food safety is essential.
Tip: Understanding safe cooking temperatures, proper food handling and the limitations of low-tech methods is part of responsible pit cooking.
Building a Pit for Cooking
Choose an appropriate location. Open spaces away from buildings, vegetation and overhead hazards are generally preferred. Local soil conditions, drainage, and wind exposure all play a part in how a pit performs.
Determine the proper size. Rather than exact measurements, think in terms of proportion: large enough to hold food and heat sources comfortably, but not so large that heat dissipates too quickly.
Common pit types include:
- Shallow earth pits, which are temporary and often used for occasional cooking
- Stone-lined pits, which retain heat more efficiently
- Temporary vs. semi-permanent pits, depending on frequency of use and land ownership. Semi-permanent pits are subject to more regulation.
Safety considerations are critical. Fire safety should always be a priority, including monitoring embers and ensuring pits are fully extinguished after use.
Fuels Commonly Used for Pit Cooking Fires
- Hardwood firewood (such as oak, maple, hickory or fruit woods)
Burns hot and produces long-lasting coals, making it well-suited for heat retention.
- Seasoned (dry) wood
Cleaner-burning than green wood, with less smoke and more predictable heat.
- Natural lump charcoal
Provides consistent heat and minimal additives compared to briquettes.
- Charcoal briquettes (where permitted)
Offer predictable burn characteristics, though they may produce more ash.
- Local, untreated wood
Often preferred to reduce environmental impact and comply with firewood transport rules.
- Supplemental kindling
Smaller pieces of dry wood used to establish the initial fire before larger fuel takes over.
Tip: More excellent info here on building a fire for cooking.
Foods That Work Well for Pit Cooking
Because the method relies on slow, retained heat, foods that tolerate long cooking times perform best.
Ideal pit-cooking foods share several characteristics:
- Dense structure that holds up to extended heat
- Natural moisture or protective wrapping
- Improved flavor and texture through slow cooking
Common examples include:
- Large cuts of meat with connective tissue
- Root vegetables such as potatoes or carrots
- Whole poultry
Tip: Delicate foods that require precise timing or high heat are generally less suitable.
Pit Cooking Recipes
Recipe 1: Pit-Cooked Root Vegetable Medley
Overview
Typically includes vegetables such as potatoes, sweet potatoes, carrots, parsnips, turnips and beets.
Why It Works
Root vegetables are ideal for pit cooking because their dense structure allows them to soften gradually without losing shape or becoming mushy and do not require precise temperature control.
Preparation Considerations
Vegetables are usually scrubbed clean and left whole or cut into large, uniform pieces. Wrapping them (commonly in layered leaves, parchment or foil) helps retain moisture and prevents direct contact with soil or ash.
Typical Cooking Time
- Approximate range: 1.5 to 3 hours
- Smaller pieces cook faster; larger whole vegetables take longer
- Denser roots like beets may require the full-time range
Expected Results
The vegetables emerge tender throughout, with lightly caramelized edges and an earthy, slightly smoky flavor. Texture is more like slow-roasted vegetables rather than boiled.
Recipe 2. Slow Pit-Cooked Pork Shoulder (My Personal Favorite)
Overview
Pork shoulder is a classic pit-cooking cut because it contains connective tissue and fat that break down slowly under prolonged heat. This transforms a tough cut into something tender and richly flavored.
Why It Works
Pit cooking excels at maintaining moderate, even heat over many hours, which is perfect for collagen breakdown without drying the meat.
Preparation Considerations
The shoulder is typically cooked whole or in large sections. Wrapping helps preserve moisture and shields the meat from ash. Seasoning is usually applied simply, as extended cooking naturally deepens flavor.
Typical Cooking Time
- Approximate range: 6 to 10 hours
- Smaller shoulders may finish earlier
- Larger cuts benefit from a full overnight or all-day cook
Expected Results
When done properly, the meat breaks apart with a fork. Flavor is deep and savory, often with mild smokiness depending on fuel choice.
Safety Notes
This recipe highlights why internal temperature awareness matters, even in low-tech cooking. Pork should be fully cooked and pit cooking should only be attempted after practicing heat management under controlled conditions.
Recipe 3. Whole Chicken Wrapped for Pit Cooking
Overview
Cooking a whole chicken allows the bird’s natural moisture to circulate during cooking, helping to prevent dryness. Proper wrapping is especially important for poultry.
Why It Works
Whole-bird cooking distributes heat more evenly than cutting the chicken into pieces. The pit’s steady heat helps gently cook both dark and light meat.
Preparation Considerations
The bird is typically left whole, sometimes with aromatics inside the cavity. Wrapping protects the skin and helps regulate moisture loss.
Typical Cooking Time
- Approximate range: 2.5 to 4 hours
- Larger birds take longer
- Heat consistency matters more than speed
Expected Results
The meat should be fully cooked, moist and tender, with mild smoky notes. Skin may not crisp the way it does in an oven, which is normal for pit cooking.
Safety Notes
Poultry requires special attention to food safety. Practicing with reliable temperature-checking methods before relying on pit cooking for poultry is strongly recommended.
Pros of Prepper Pit Cooking
- No reliance on electricity or modern appliances
- Ability to cook large quantities at once
- Flexible fuel options
- Long cooking times that require minimal active attention
- Preservation of cultural knowledge and practical skills
These benefits make it a useful supplemental method rather than a replacement for everyday cooking methods.
Cons of Pit Cooking
- Time-intensive preparation and cooking
- Requires experience to manage heat effectively
- Weather and soil conditions can interfere
- Limited temperature precision
- Cleanup and environmental restoration are necessary
Understanding these drawbacks helps set realistic expectations. You can also find a great overview of more outdoor cooking methods here.
Common Mistakes When Pit Cooking
Many issues stem from inexperience rather than the method itself.
- Inadequate heat preparation, leading to undercooked food. Poor wrapping can allow moisture loss or contamination.
- Opening the pit too often releases heat and disrupts cooking. Underestimating cooking time is another frequent error.
- Overlooking basic food safety principles or waiting until an emergency to attempt pit cooking for the first time.
Tip: Practicing under calm conditions is the most effective way to avoid these problems.
Safety, Planning, and Responsible Use
Pit cooking should always be practiced before it is needed. Familiarity reduces risk and improves results. Food safety, including hygiene and temperature awareness, is essential.
Fire safety and legal compliance must be respected at all times. Pit cooking is often legal on private property when done responsibly, but it is rarely unregulated.
The best and safest approach is to check local fire department guidelines or municipal codes before digging or lighting a pit.
Key Takeaways
- Pit cooking is an ancient, low-tech cooking method that uses stored heat rather than direct flame.
- Appeals to preppers because of its simplicity and can scale to feed larger groups.
- Works best with dense foods that benefit from long, slow heat, such as root vegetables, large cuts of meat and whole poultry.
- Requires planning, patience and hands-on practice. It is not suited for quick meals or emergencies.
- Temperature control is limited, making food safety awareness especially important.
- It’s time-intensive and influenced by weather, soil conditions and fuel choice.
- Common mistakes include inadequate food protection, poor heat preparation and lack of prior practice.
- Fire safety, legal compliance and environmental responsibility are essential parts of pit cooking.
- Most effective as a supplemental skill within a broader preparedness plan, not as a primary cooking strategy.
- Learning and practicing pit cooking under calm conditions builds confidence and reduces risk.
FAQs
Is pit cooking safe for beginners?
It can be, provided it is practiced deliberately and with attention to safety and food handling.
How long does pit cooking usually take?
Pit cooking often takes several hours. Exact timing depends on food type, pit design and heat retention.
Can pit cooking be done in urban areas?
Urban settings may have restrictions on open fires or ground disturbance. Always check local regulations before attempting pit cooking.
What types of fuel work best for pit cooking?
Natural fuels such as wood or charcoal are commonly used. Fuel choice influences heat retention and flavor.
Does pit cooking require special equipment?
No specialized equipment is required, but appropriate materials and safe practices are essential.
Is pit cooking legal everywhere?
Laws vary by location. Always verify local fire and land-use regulations.
(Disclaimer)
This article is provided for informational and educational purposes only. It does not constitute outdoor cooking or fire safety advice. Outdoor cooking involves inherent risks. Readers are encouraged to seek instruction from qualified cooking and fire safety professionals and to take responsibility for their own outdoor cooking decisions.