Food scarcity is one of my biggest fears. I may be two generations removed from the bread lines during the Great Depression and food rationing during World War II, but it still creeps into my mind every so often.
The Covid pandemic created a sense of food (and toilet paper) insecurity. But it doesn’t take a catastrophic event to affect your food supply.
Storms or flooding can keep you from getting to the store for a while. Shipping and supply chain disruptions can lead to empty shelves. Plus, changes in the economy could make it necessary for folks to tighten their belts to get through tough times.
I’m big into food storage, canned and dehydrated goods mostly. And I have plenty of it. But having to live on that day in and day out for an extended period of time would get real old real fast.
As far as meat goes, I don’t like to keep too much in the freezer. Some people, AKA my father-in-law, will tell you it’s fine to keep a chuck steak in the chest freezer for a year or so. Thanks, but no thanks. My stock gets rotated and used within 2 months, 3 tops.
About a year ago or so, I was hanging out in the backyard with my friend, Rich, and we got on the “what would you do if” food scarcity topic. That was my intro to these hearty beef soup cubes.
Made from real beef and vegetables, they pack a flavor and calorie punch and take your basic staples to the next level. It’s a great way to stretch ingredients and your budget (since it costs just pennies per cube).
And yeah, when properly reduced, dried, and stored, they can last up to two years.
Real Beef Is MUCH Better Than Powdered
Keeping bouillon cubes on hand is fine and convenient. But come on now.
Store bought bouillon cubes do not compare to the flavor and nutritional value of your homemade soup cubes. You get to control the seasonings, salt levels, and ingredients. And you get to make use of every part of the meat and trimmings.
So Many Possibilities
Drop a cube into hot water and you have instant beef broth. It blows away anything that comes from a can or jar. Add hot water and you’ll be smelling the beef simmering again, just like when you made it.
Add it to rice, barley or pasta and you’ve got a meal instead of a side dish.
Probably my favorite thing is to make soup or a stew base with them, combining a cube with dried beans or lentils or even just vegetables.
You can even just break off small pieces to season sauces or sautéed dishes. But don’t stop there. I’m sure you’ll find a lot more ways to spice up everyday staples with them.
What You Need
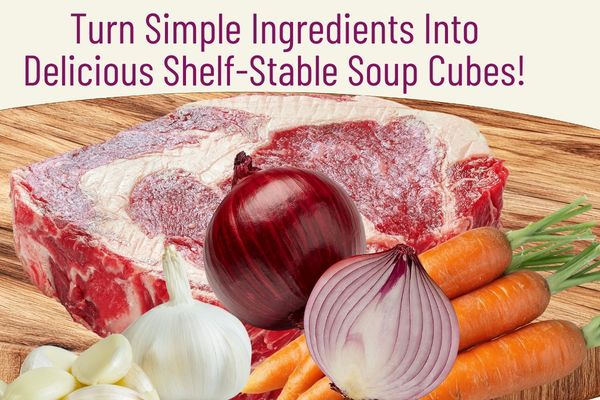
At the heart of the recipe is the hero, 2-2.5 lbs. of beef steak. You don’t want a lean version here. My go-to is a nice ribeye, but a chuck eye or similar well-marbled cut works just fine.
For the rest, one large onion, two carrots and if you like, two celery stalks, all chopped. Smash four cloves of garlic, an absolute must. A few bay leaves, a teaspoon of black peppercorns, salt and dried thyme, a tablespoon of apple cider vinegar and 8-10 cups of water.
Then you’re ready to rock and roll.
Get Your Chef Hat On
Alright, cut that steak into large chunks, leaving the fat intact. Put a large pot over medium heat, then add the beef in batches.
Don’t overcrowd it, give everything some space. You want to brown them on all sides, so you get a nice, deep crust. This is where the flavor starts to develop.
OK, now you’re ready to get that broth going. Throw the onion, carrots, celery, and garlic in with the browned meat. Pour in the water and make sure everything is covered. Now, toss in the bay leaves, peppercorns, salt, thyme, and vinegar.
Bring the pot to a gentle boil, then cut it down to a low simmer. I let it simmer for 4-6 hours, either uncovered or partially covered. Stir it once in a while and skim off that foam that rises to the surface.
After simmering, remove and strain out all of the solids and set the liquid to the side. Keep that beef and those veggies on hand though. You’re going to need them later. If the steak you used has a bone, save it to make something else.
A layer of fat is going to rise to the top. Now I know you’re going to be tempted to leave that in, but if you do, your cubes aren’t going to last nearly two years. Skim it out. Don’t worry, it’s still going to be very rich.
The Final Steps
You want to bring that strained liquid back to the pot and simmer uncovered. It’s going to reduce by 70-80%, but that’s OK. It’s what you want because what’s left is the flavor concentrate.
You’ll know it’s done when it coats the back of a spoon.
Now break out the blender. Grab those meat and veggie pieces you saved earlier and blend them until fairly smooth, then mix them back into the broth. It thickens everything up, adds more flavor, and helps the cubes hold together when it’s time to dry them.
If you don’t have a blender, no worries. Chop up everything as best you can into tiny pieces and mash it good.
Grab a shallow pan and line it with parchment paper or you can lightly grease it and pour the thickened concentrate into it evenly. Getting an even layer is key here. If it’s not set right, you’re going to have issues when you dehydrate it.
I like to aim for about 1 to 1½ inches thick and really smooth the top out.
Let the mixture cool completely at room temperature, then put it in the fridge until fully firm. It should have a dense, gel-like consistency when ready.
Remove it from the pan, place it on a cutting surface, then cut into cubes approximately 1 to 1¼ inches. That’s the sweet spot.
Dehydration Time
This is the make-or-break step for how long your cubes will store for long term.
Place the cubes in a dehydrator or in the oven at 125–135°F. This could take a few hours or up to a whole day depending on how heavy your hand was when pouring. Bottom line, it has to be completely dry.
What you’re looking for is firm or brittle, dry all the way through and absolutely no soft or sticky spots.
Whenever I have any doubt about moisture left inside, I just keep letting it dry. Even the smallest amount of moisture can affect how well they store over time.
How To Store Long-Term
Two words: Airtight packaging. Vacuum-sealed bags work well. Glass jars with tight-fitting lids will do it, too, but they take up a lot of space. Mylar bags with oxygen absorbers are the gold standard.
Store them somewhere cool with low humidity and reduce exposure to light. I just keep mine in the pantry, but I have a lot of room. Basement shelves are always good.
With a potential two-year shelf life, make sure to get the date on the label and as always with your stock, rotate, rotate, rotate.
Where You Can Go Wrong
I messed up a few of my first beef soup cube batches for sure. The first time, the stock was too thin before it dried. That knock-out flavor just wasn’t there, and they wouldn’t have stored as well if I didn’t toss them and start again.
Rushing the drying process is another big no-no.
Final Thoughts
You’re not going to live on them, but these beef soup cubes will definitely add life to simple meals. The taste and smell will have you salivating when you’re just adding them to rice or pasta or whatever else.
They are an absolute powerhouse of flavor, nutrients and calories, cost just pennies per cube and take up almost zero space. What’s not to love?
And they’ll be there when you need them.
Anthony Vion is a lifelong prepper from Long Island, NY, with decades of hands-on experience in outdoor living, food preparation, self-reliance, and practical skill-building. He focuses on breaking down complex ideas into clear, usable advice that readers can actually apply.
This article is for informational purposes only and does not constitute food safety or food preservation advice. Always follow proper food handling and storage guidelines.