Before, during, and after a disaster scenario, professional medical help may not be available. What do you do if someone under your protection suffers a sprain?
Let’s explore how to treat sprains, especially considering how common this injury type is.
What is a Sprain?
Ligaments are tough, elastic-like bands that attach to your bones and hold joints in place. When you excessively stretch a ligament too far, the injury is called a “sprain.” A ligament can experience partway tears or be completely torn apart. Sprained joints quickly swell and the pain can be intense based on the extent of the sprain.
Common sprains:
:: Ankles
:: Knees
:: Wrists
:: Fingers
Assessing Injury and Recognizing Sprains
When you’re assessing your own potential sprain or treating another person’s sprain, you’ll want to know a few basic identifiers to recognize a sprain.
Noticeable symptoms:
:: Extreme pain
:: Swelling
:: Bruising
:: Limited mobility in the affected joint
The swelling signals that there is damage to the ligaments. You see, swelling is the result of fluid accumulation and inflammation, the body’s natural healing response. Bruising from a more extreme sprain, indicates bleeding within the tissues. Any time a ligament is compromised, it will result in limited mobility.
By accurately identifying a sprain, you can ensure to effectively treat the injury. Rest assured that for most sprains, preppers can treat the injuries themselves with some knowledge, skill, and supplies.
Sprain vs. Fractured Bone Without an X-Ray Machine
You can differentiate a sprain from a fracture by checking for deformity, severe pain, inability to move, and if the injury site can bear weight. However, it’s crucial to seek a professional assessment to be confident of an accurate diagnosis.
Symptoms of a potential broken bone:
:: A “popping” sound with the injury
:: Numbness vs. feeling pain
:: Complete inability to move the injured joint or limb
:: Complete inability to bear weight on the limb
:: Limb buckles when the injured joint is used
How to Treat a Sprain
Sprains are a common injury and can occur in many different ways. Whether turning an ankle while stepping off a curb or falling and landing on a wrist, one thing is consistent, the PAIN! However, while a sprain may seem minor compared to a bone fracture or break, you must administer proper treatment to prevent further damage and promote healing.
Whether you incur a sprain yourself or treat a sprain on another person, here are some basic steps to that include the R.I.C.E. method: Rest, ice, compression, and elevation.
<1> REST the injured area
Immediately rest the sprained or strained area to prevent further injury and begin the healing process. A period of rest will help to minimize swelling, alleviate pain, and protect the injury from added stress. Moving a sprained ligament may increase inflammation in the early healing stages. The injured person should not put weight on the injured area for 48 to 72 hours.
Should an ankle or knee sprain occur during a period of bugging out to find a safe location, immediate rest may not be an option. Try to find long, sturdy tree branches or pieces of wood to use as crutches to continue moving. When you find a safe spot to build shelter, be sure to rest the sprained area.
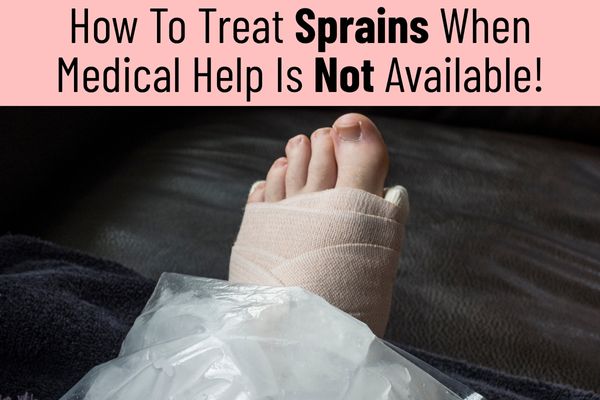
<2> ICE the area
After ensuring the affected area is at rest, icing the injured area is the next step. Depending on your location, apply a cold pack, bag filled with ice or soak in cold water or an ice bath to keep the swelling down after a sprain. If you’re bugging out to find safety without ice or ice packs in your prepper supply, stop and place the injured area in a cold source of water like a pond or river.
Cold therapy such as applying ice to a sprain reduces swelling and inflammation by constricting blood vessels, helping to reduce pain and speed up the healing process. Limiting the blood flow to the injured area, can also help to minimize bruising.
If applicable, ice for 15-20 minutes every 2-3 hours during the first 48 hours until the swelling reduces. Don’t use ice for more than 20 minutes at a time. Never put ice directly against the skin to avoid skin damage so be sure to use a thin towel or cloth for protection.
<3> COMPRESS the Injured Area
Now that you’ve iced the area, the next step is to start compression on the injured area to help reduce swelling even further. To do so, wrap injured area with an elastic wrap or bandage, or a neoprene compression sleeve. Medical wraps come in various sizes, widths, materials, and versatile styles, to accommodate sprains on a finger, wrist, arm, ankle, and knee. If you lack first aid supplies, you can improvise by using articles of clothing like a T-shirt or sock.
Here’s how to perform efficient compression:
:: Begin wrapping the limb or joint from the end farthest from the injury, moving towards the center to aid in efficient fluid return.
:: Each turn should overlap the previous layer to ensure uniform pressure and support.
:: Secure the bandage with clips or fold bandage ends to prevent the wrap from loosening.
:: Always check the circulation after applying a wrap to ensure that it’s not so tight that it restricts blood flow resulting in numbness, tingling, or discoloration.
To manage a sprain, it’s important to apply the right level of compression which should fit comfortably. Do not wrap ice on the skin underneath the bandage. The injury should have already been iced before you wrap it. If you feel the need to ice again, temporarily remove the wrap. It’s recommended that medical wraps do not remain on the sprained area for longer than two days.
<4> ELEVATE the Inured Area
Now that you rested, iced, and compressed the injured area, elevate the limb to be positioned above the heart. This helps keep swelling down by helping fluid drain away from the injured area. Elevation is important when managing a sprain to help speed up recovery times.
Proper injury elevation:
:: Comfortably prop up the injured area using a pillow or folded blanket, towel, or clothing.
:: Aim to position the area above the heart but not cause further discomfort.
:: Adjust the elevation should any numbness or tingling be felt, symptoms of compromised blood flow.
:: Maintain elevation as much as possible within the first 48 hours.
Pain Relievers for a Sprain
Now that you’ve effectively followed the R-I-C-E method of rest, ice, compression, and elevation, the sprain may still be causing significant pain. In that case, recommended non-prescription pain relievers such as ibuprofen (Advil) and acetaminophen (Tylenol) can be taken for pain management and to help with inflammation. Be sure to follow the recommended dosage and as with all medications, monitor for potential side effects. Do not take any medication that has previously given the patient an allergic reaction.
Monitor the Healing Process
Regular monitoring the healing progress allows you to make adjustments of the applied treatment as needed. Sprains can take days or weeks to heal, severe sprains may extend to months of recovery. Continually evaluate the healing process to catch any early complications that could exacerbate the injury and recovery process.
After the first 48 hours, gentle weight and movement can be applied to the injured area, as a gradual improvement should begin to be noticeable. Avoid activities that could add too much stress to the sprained area. Compression bandages can be considered to offer support without delaying the healing process.
Here’s what to monitor during the healing process:
:: Has the swelling reduced from the time of injury?
:: Is the pain lessening?
:: Has the bruising faded or is there a change in color indicating possible infection?
:: What is the range of motion of the affected joint as it begins to heal?
:: Is the ability to bear gentle weight and movement manageable?
Should you observe that symptoms are not improving as expected, seek professional medical intervention if and when it’s possible to do so. Failure to feel or see improvements may mean that a ligament was completely torn. Further imaging tests like X-rays or MRIs, may be the only way to determine the extent of the sprain.
Prepper Essentials: First Aid Treatment Supplies For Sprains
Consider these first aid supplies to treat sprains:
:: Elastic bandage with self-enclosure
:: Knee brace
:: Ancle compression brace
:: Finger splint
:: Wrist brace
:: Arm sling
:: Finger splints
:: Instant cold pack
:: Waterproof tape
:: Triangular bandages
Prepper’s Role to Treat Sprains During Emergencies
Whether you’re bugging in at home or moving to an outdoor environment during a disaster scenario, your role may be as a first responder during an emergency when professional medical help is not available.
After you diagnose a sprain because of seeing pain, swelling, and bruising, immediately begin the R-I-C-E method of treatment. Rest, ice, compression, and elevation are key steps for effective sprain recovery. Administering proper first aid treatment in the early stages of a sprain enables a more efficient healing process.
By following these first aid steps and acquiring sprain-related treatment supplies, you can more confidently provide emergency first aid for sprains.